Tiles offer durability, strength and style. They are also easy to maintain. But the hardest tile can still crack, chip or break over time. Minor damage might appear to be harmless. But it can easily spread and have an impact on the appearance and safety of your floors or walls. The good news is that these issues can be fixed. Crack tile repair is simple with the right approach. This post will discuss what causes tiles to be damaged and how best to repair them.
Common Reasons Behind Cracked and Broken Tiles
Tiles don’t spontaneously crack. Knowing the cause allows you to better select the right method for a wall or floor tile chip repair and prevents repeat damage. The following are the most common reasons that tiles crack and need replacement:
- Structural Movement
Buildings move, driven by soil movement, temperature differences, and other factors. Such motion-induced stress can be transferred onto tiled surfaces. That can lead to a cracked tile with chips appearing diagonally or straight across the surface. Most of these cracks are a sign of pressure from below, rather than surface wear and tear.
- Poor Installation
Incorrect adhesive coverage, uneven substrates, or rushed workmanship can weaken tiles from day one. Gaps beneath tiles create hollow spots that fail under pressure, leading to broken tile repairs being needed far sooner than expected.
- Heavy Impact
Dropping heavy objects such as tools, cookware, or furniture can damage tiles instantly. This often results in chips or visible fractures that require tile chip repair to restore both appearance and safety.
- Moisture and Water Damage
If water gets under tiles, it can compromise adhesives and substrates. Eventually, this will cause the tiles to become loose, crack or lift. That’s why you might need to do bathroom tile repair more frequently than other areas in your home.
- Worn or Damaged Grout
Grout plays a major role in supporting tiles. When it erodes or cracks, tiles shift slightly underfoot. This movement often leads to tile grout repair being necessary before tile damage worsens.
Steps to Fix Cracked and Broken Tiles
Repairing tiles is a careful process. Check out the steps below to proceed with it correctly:
Step 1: Assess the Damage
Begin by looking at the tile closely to determine how damaged it is. Cracks and chips can often be repaired. But loose, severely broken or hollow-sounding tiles should never go unattended to as they are a safety hazard. Complete tile replacement might be necessary for such severe damage.
Step 2: Bring Out Your Tile Repair Kit
Round up all of the tools and supplies before you start the job. The entire job goes much smoother without any interference with a complete tile repair kit at your disposal.
Step 3: Clean the Damaged Area
Wash the surface clean with water to remove dust, grease and loose granules. A good cleaning is an absolute must for a strong bond. It is particularly important when dealing with floor tile repair in high-traffic areas.
Step 4: Choose the Appropriate Repair Method
Determine if the tile requires filling, re-bonding or replacing based on the extent of damage. Minor surface issues may only need crack tile repairs. But more serious damage demands extensive work.
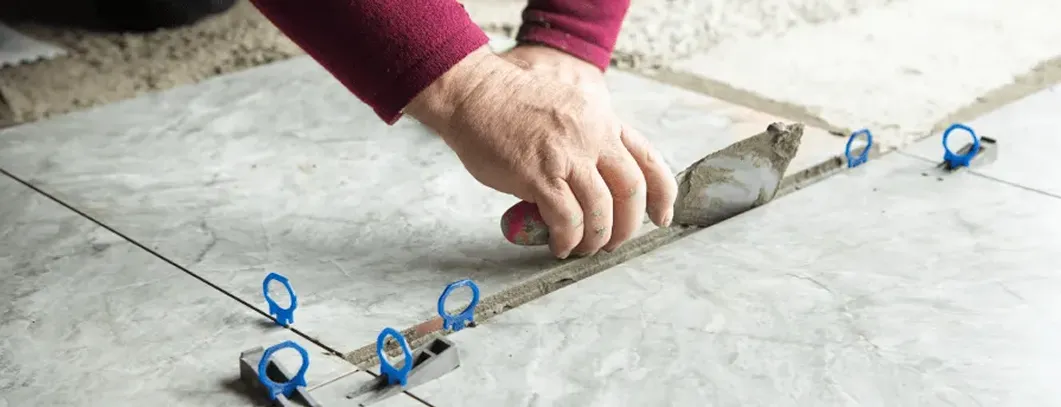
Step 5: Mix and Apply Epoxy or Adhesive
Prepare the adhesive or filler and spread it gently onto the damaged area. For cracks that are visible, colour-matched tile crack filler is necessary for durability and appearance.
Step 6: Remove Excess Adhesive
Smooth out superfluous material before it hardens to maintain a level surface. This is important to ensure a clean and permanent tile crack repair that matches the rest of the tiles.
Step 7: Paint the Repaired Area (Optional)
The repaired spot might not match the remaining areas. In that case, apply matching paint to help fix cracked tile areas so they blend naturally with the rest of the surface.
Step 8: Apply Grout (If Necessary)
If grout lines were impacted, reapply grout in a precise manner. Be extra careful when you repair grout in shower areas to keep water from getting under tiles.
Step 9: Seal the Grout (Optional)
Once grout has cured, sealing adds protection against moisture. This step supports long-term performance, especially in areas requiring waterproof tiling Perth standards.
Step 10: Clean and Polish the Repaired Tile
After everything has dried, wipe the surface clean and polish it gently. This final clean helps the repair sit seamlessly, particularly after tile replacement & restorations.
Step 11: Final Inspection
Examine the replaced tile for levelness, colour match and stability. After tile replacement, you can also tap lightly to make sure the pasting is good.
Step 12: Regular Maintenance and Prevention
Examine tiles often, and take action early on small problems. Regular maintenance, such as timely shower grout repair, helps to reduce the potential for future damage and increases the longevity of your tiled surfaces.
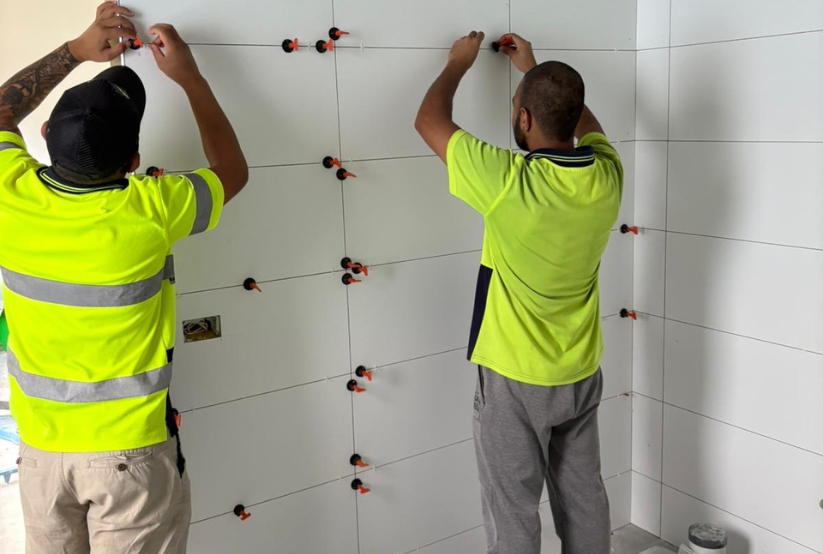
When to Call in Professionals
If you have tile cracks that won’t go away, damaged tiles throughout a large surface area or loose-feeling tiles when you walk on them, it’s time to contact professional tilers Perth. These signs commonly indicate more significant problems, such as an incorrect installation, substrate movement or moisture issues that can’t be solved with common tile grouting repairs.
Projects involving full retiling, waterproofing, or extensive floor and wall work are best handled by experts in tiling Perth. Professional workmanship ensures correct preparation, proper sealing, and a finish that lasts without recurring problems.
Conclusion
Cracked or damaged tiles might not require a whole renovation. When properly assessed and repaired, damaged tiles can be safely and cleanly restored. Whether you have a tiny chip or need a full replacement, the sooner you fix the issues, the better for your floors and walls. Whether you are dealing with grout problems, water damage, impact cracks or any other tiling-related problem, experienced Perth tilers can make sure the repairs last and look good.